Monday, March 31, 2008

Tutorial: Necklace organizer

So, I've had this craft burning a hole in my brain for, like, months now. Because I have this rad jewelry box that Bubba gave me that does everything except keep my necklaces from wildly embracing each other and turning into a big spaghetti mess.

I've tried sticking their pendants into the ring holder parts. I've tried carefully laying them out under the removable tray. I've tried leaving them unclasped. I've tried throwing them in there overhand style. Nothing works. Every time I open that box all the necklaces have reached out and grabbed onto 16 other things and created a giant wad of beads, bangles and knots.

Yarf.

Until I had a night of eventful insomnia and I managed to mastermind a solution while also staring at the ceiling and listening to *some people* snore and steal my sheets.

I would craft an insert that would fit into the mirrored lid of the box. It would have tiny hooks to hang all the necklaces AND it would have a little pocket at the bottom for their big snaggly pendants to hide.

Oh, but what about the mirror? I certainly can't be trusted to poke earrings through my ears without the very necessary guidance of the mirror.

WHAT IF I CUT OUT A HOLE IN THE INSERT SO I CAN STILL SEE THE MIRROR?

Oh yes. Now we have a deal.

A hundred years later (yesterday) I finally had the opportunity to get this craft out of my head and into my jewelry box.

Thanks to Bubba, aka Materials Master, I had the "Magic Material" with which I could craft this project and thanks to Kate, I had the fabric to make it pretty. All the other parts and pieces I managed to fill in using my own imagination which mostly consisted of the $1 bin at OSH and the tools from Bubba's garage.

So, the Tutorial part. Right, here we go...

Project: Necklace Organizer Insert

Supplies & Tools:
Corrugated plastic sheeting or For Sale sign (large enough to fit inside your box lid)
Fat quarter of fabric
Matching thread
12 Eye or hook screws (+ or - depending on your needs)
4-6 inches of coordinating 1/2" ribbon
E-6000 or other strong craft adhesive
Box cutter with sharp blade
T-square or ruler
Pliers
Wire cutter
Sharpie or other marking tool
Iron
Painter's tape (masking tape also works fine)
Bench vice (optional)
Super 77 spray mount adhesive (optional - you can use E-6000)

Step 1: Measure & cut the corrugated plastic to fit

First of all, this is what corrugated plastic looks like:


I opted for a nice $7 For Sale sign rather than a billboard sized sheet of it at the hardware store. This was MORE than enough for this project, even allowing for the number of Whoopsy! measurement mishaps I was planning to have.

Once you have your plastic in hand, go to your jewelry box and measure the interior width, height and depth of its lid. If the depth of your lid is shallower than the corrugated plastic + a half inch or so, you might have to rethink your materials. My box lid was just under an inch deep, so this material combo worked just fine, even loaded with jewelry.


Then take your measurements, plastic, box cutter, Sharpie and T-square/ruler to a nice cutting surface and mark your exact measurements on the plastic.

When you cut out the plastic, CUT JUST INSIDE YOUR MEASUREMENT MARKS. This will leave enough room to wrap it in fabric and add a pocket so that it will fit snugly in the lid of your jewelry box without being too large. If you cut it exactly the same size, it won't fit.

If you're super anal retentive and paranoid like me, you can now check to make sure that your plastic piece fits the lid with a *tiny* bit of room around the edges to spare.


Step 2: Cut out the mirror window

If you're like me, you need a mirror to tell you when you're about to jam an earring into your eye. So - cut a window into your plastic piece so that once you insert your Insert (teehee) you'll still have a mirror to warn you of imminent danger. If you're all super coordinated and don't need this kind of assistance, then you can skip this step and keep your fanciness to yourself.

No one likes a show-off.

Using your ruler and Sharpie, measure in about 2 inches in from the edge of your plastic and make a mark, do this from top, bottom and both sides and then use your ruler to draw an interior border to guide your box cutter.


*Note: 2 inches is the size that worked best for my measurements (12w X 7 1/2h), but you can use whatever border width makes sense for your lid. Just leave enough of a border so that your insert will be sturdy enough to hold necklaces on hooks without bowing.


Step 3: Cut out the fabric

Lay your fabric out flat, right side down, and tape to your cutting surface with your painter's tape. Then, using your ruler, measure your fabric around the plastic so that it is the same width of your window border (from Step 2) MINUS 1/4 INCH.


This will mean that when you wrap the frame, the fabric will not show through the window hole.


Step 4: Cut the fabric to wrap the frame

First, tape the plastic insert with its newly cut window hole to the freshly cut fabric, right side down. Then, using your box cutter, cut from each corner toward the middle of the fabric, making two triangles and make one straight cut from the triangle points to open the fabric completely.


Step 5: Wrap your insert with fabric

First, place your plastic insert on your right-side-facing-down fabric and give your plastic frame a light coat of spray mount. Or, if you're using another adhesive, apply it to the plastic now.

Then pick up both of the side inside flaps and pull them snugly around the window hole and stick to the plastic. Do the same with the top and bottom flaps, securing them to the plastic.


Then, take the corners of the fabric and pull tightly around the plastic, securing to the frame.


Now, using your adhesive, apply another light coat to the plastic and newly wrapped fabric and wrap the remaining fabric tightly around the frame and press firmly to the plastic, fully wrapping the frame.


You can leave this on your cutting surface to dry, pressed beneath something heavy like a phone book or a giant cat, if you have one. *Use them together for best results.

*I forgot to take a picture of this, but it was funny, I promise.

Step 6: Sew your pocket

First, cut out a strip of fabric about 2 inches wider than your insert and about as thick as your window border. For me (14"w X 7 1/2"h) this was 16"w x 2 1/2"h.

Then fold over one long raw edge and press. This will be your pocket seam, so you can decide if you want a matching or contrasting thread to stitch.

I used a contrasting thread, rather than Safe White, because I am crazy like that, but this is a big departure from my normal Just Don't Call Attention To My Mistakes white thread that I normally would have used.

Then sew one or two "Stay Stitching" lines along the bottom edge to keep your fabric from fraying.

*Honestly I was considering doing some "Pull the bobbin thread" gathering here, a la the Lotus Tunic cap sleeves, but it made things too complicated so I decided these could just be "Stay Stitches" instead. It does seem fancy though, doesn't it?


Step 7: Attach your pocket

Place your newly hemmed pocket right side down with the "Stay Stitching" on the top. Then place your wrapped insert right side down so that one long side lines up just below the stitches and so you'll have enough of the pocket fabric to wrap around your insert.

Apply your adhesive along the long edge of your wrapped insert and fold over the pocket fabric so that it sticks.

Then apply adhesive to the sides of the pocket fabric and tuck the corners of the pocket fabric in like you're wrapping a present.


Turn your wrapped frame WITH POCKET WOO! right side up and press beneath the aforementioned Cat and Phonebook combo or other super squashing device.


Step 8: Attach your ribbon pull

Cut a 4-6 inch section of ribbon and fold over, creating a loop. Then hand sew (I KNOW I KNOW!!!) to the center of the back of your wrapped frame, opposite end of the pocket so that it will stick up above the top of the frame.


Step 9: Attach your hooks

Lay your wrapped insert, right side up, and determine the number of hooks you'll use by spreading them out evenly across the top edge of the frame leaving enough space in between to accommodate the bulk of numerous necklaces.


If you're like me and could only find screw EYES that fit your needs (ie. were small enough and not gold) you'll get an extra step here. For those of you who are perfect and found the perfect screw hooks you can move on to Step 10 and keep your fancy mouths shut.


EXTRA STEP 9A: Open eye hooks

Using your bench vice OR a pair of pliers, hold the screw end of your screw eye firmly and use your (other) pliers to pull open the screw eye until there's ample space to slip a necklace.

Step 10: Attach your screw hooks


After laying out your screw hooks (look - like magic they go from screw eyes to screw hooks!) either mark out equidistant spots to attach your hooks OR use the supah handy fabric markings to do this for you. I'll let you guess which method I used.

Then simply poke your first screw hook through the fabric at the pre-determined (ish) location and screw it in. Go a few more rounds than you'd expect so that you have a good point sticking out on the other side.

The corregated plastic is key here, since it lets you screw right through the material and the screws stay securely.


Do this for all your screw eyes. Go on, I'll wait...


Step 11: Trim the screw eyes

Flip your wrapped insert over to the wrong side and, with your wire cutters, snip off the protruding pokey parts of the screw eyes.

Then flip your insert back over and back off each screw eye one or two rounds so that the pokey parts are no longer poking out. Yay! Less stabbing!


Step 12: Fit your insert into your jewelry box

This is the part we all love and, really, the reason I embark on any craft - The Final Pay Off.

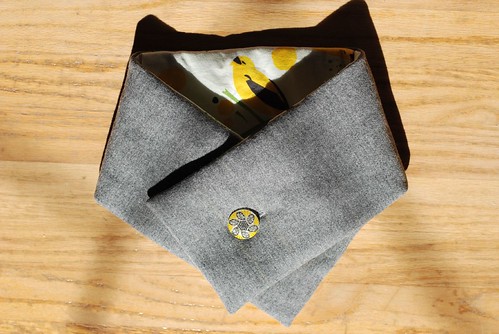
You probably don't need me to tell you what to do at this point, but just for consistencies sake, take your finished Necklace Organizer Insert (yes, that's what I'm calling it because I'm *so* creative) and insert it into your jewelry box lid while MAKING SURE THAT THE RIBBON PULL DOES NOT GET TUCKED BEHIND THE INSERT.

It should fit snugly and should allow you to bend it slightly to slide it in. Thank you corregated plastic and Materials Master Bubba for this very handy advice.

Step 13: The fun part - LOAD IT UP

Now that you're done with the crafting you can start the real fun part: ORGANIZING. I started out loading bracelets, earrings and necklaces on the organizer, but in the end, opted for just necklaces since that alone frees up enough room in the rest of the box for everything else.

Oh, and tuck in the ends of your necklaces, with their big troublemaker pendants and what not, right into the bottom pocket. No more illicit affairs between chains and earrings? Oh yes, it is THAT good.


Um, just like magic? Yes, people. Crafty Magic.

Tomorrow - new project for Finny and Donk's Sewing Adventure.

Thursday, March 27, 2008

Oh the shame


So, I'm sorta ashamed to tell the whole wide Internet what a foul beast I am, but at the same time, I'm kinda in awe of this grotesque accomplishment.

Remember when my dear friend Shelley sent me the most indulgent and ultimately shocking gift of all time? And then I made some inane comment about how I *could never* eat it all and what WILL I do with all of this sinful and ridiculous hazelnuttiness woe is poor me?

I did. At least I made those comments to Bubba while he was sizing up that tub of Nutella cradled in my arms, wondering aloud if this was the last time he'd see his wife in normal size.

And really, to myself, I was wondering the same kinds of things. Like whether this was going to undo all those years of faithful gym going and my recent affair with running or force me to release my stranglehold on size 8 jeans and just go ahead and forget about ever getting into a 6 again. I wondered these things and then, alas, my spoon and I dove straight in.

For a year and a half.

The Nutella Tub lived in our cupboard for all that time, through goopy heat waves and rigid frigidness. Through batches of sandwich cookies and bizarre side dishes. And through many baking experiments that were more a cry for help so that my thighs and ass might be rescued from the impending doom of palm oil derived calories than a desire to bake something delicious. (You should know, I was giving this crazy baking way so I could, like, save myself.) And then through many, many bouts with The Big Spoon.

And finally, a week or so ago, I decided it was time to let go of the suddenly crystallized (and frankly deeesgusting) remains and give the hell up. I mean, we'd had a good run, the Nutella and I, and I was ready to open my cupboards again without the self-loathing that comes from knowing that right next to the oat bran and flaxseed is a giant ironic tub of naughtiness.

Also - Bubba has been eyeing that jar for use in the garage for ages, so it seemed like good inspiration.

I think this spring cleaning was a good idea. Because I like to fit into my pants and also because I think I've gotten this whole "I want Nutella tattooed across my back" thing out of my system. Not that I now hate it or something like I did for so long with Oreos and how I still do with those gross circus animal cookies, but I definitely don't find it as irresistible as I once did and frankly don't even find it that appealing anymore.

Am I broken? Perhaps. But that's what happens when you manage to make your way to the bottom (or close, anyway) of a 6.61 lb jug of Nutella. You break your Ilovechocolateandhazelnutometer.

For the record, to break your IloveOreocookieometer, all you have to do is escape the supervision of your mum, crush half a dozen Oreos with a few gigantor spoons of Cool Whip and watch an episode of Thundercats after a hot day of third grade. You will then puke it all up in the backyard and never want either Cool Whip or Oreos for a really long time.

Same thing goes for your Ilovecircusanimalcookiesometer too, just subtract the Cool Whip, double the amount of cookies and swap Thundercats for a heated game of dodgeball in the driveway. Barforama. Plus, you'll be sworn off Circus Animals indefinitely, instead of letting them carefully sneak back into your life about ten years later during a moment of insobriety at a college kegger.

I am CUH-lassy, I know. Congratulate me already!

Tuesday, March 25, 2008

I don't even want to talk about it + I CAN'T WAIT TO TALK ABOUT IT.

I started this post at least three times already. Trying to recount, in a way that didn't make me want to barf, the other pipe explosions we had after Pipe Explosion #1.

I've given up.

It's sad, too, because I even managed to take pictures of the other ruptured pipes and the big pudding puddles they created in our yard, but I am, like, SO over busted pipes at this point that I don't even have it in me to make jokes about it or even scream swears.

Sure, some people spent Easter Sunday prancing in meadows wearing floofy lavender dresses searching for magic sparkly chocolate eggs while we were up to our shoulders in filth muck hunting for the hole in a rusted 100 year old pipe BUT WHATEVER. I'm barely even annoyed anymore.

Like I said, I'm over it.

So, rather than sit here and bore you with my flagrant ranting (which, by the way, was going to be some pretty first class ranting by the collection of "shits" and "fucks" that got picked up by the spellchecker), I am going to move on to happier topics like my fourth vegetable bed.


Don't worry - I'll try to work in some flagrant ranting for flavor's sake.

After the Pipe Explosion That Will Not Be Named on Easter Sunday morning, Bubba and I made our traditional trip to Home Depot to get the goods for veg bed #4. And because we know that Easter Sunday is the best day of the whole wide year to shop at Home Depot, we took our long list that even included 24 cubic feet of soil and were STILL in and out in half an hour.

It was really pretty awesome. Even for Easter Sunday at Home Depot.

Have I told you about Easter Sunday at Home Depot? Let me derail for a moment. You'll thank me.

Easter Sunday is the best day of the entire year to shop at Home Depot. I'd wager it is the best day of the year to shop at most stores, if they're open, but it's especially sweet at HD given the unbridled mayhem in that store on any other day - which goes twice for weekend days.

Easter Sunday, when all the good and decent people are at church and doing the aforementioned frolicking with magic eggs, the heathens like Bubba and I descend on the vacant aisles of Home Depot with our long lists and focused flatbed carts.

Because this is the day when you can *gasp* push a cart down the aisles without having to scream or kill anyone. You can actually get a look at the whole rack of miscellaneous breaker box covers without having to shove a crazy old woman out of your way. Or worse, her cart with the two ravenous Chihuahuas in it.

This is the day when you can show up, park closer to Home Depot than to your house, and stroll in without having to say "excuse me. Excuse Me. EXCUSE ME. MOVE YOUR FUCKING ASS!" two feet after crossing the threshold.

If you do not believe me, then I encourage you to skip church and fruity egg hunting next Easter and try it out. Bring your long list and leave your patience at home - you won't need it. Just the list and your debit card. You can do a year's worth of HD shopping in an hour and never have to come back all year.

In a word, it is Grand.

So the point of this year's Festive Easter Shopping at Home Depot was to get all the stuff to make veg bed #4, which I am proud to say IS IN.

It is in, and plumbed and seeded and not yet growing so I'm not going to get too crazy about photographing it because it will just be boring to you and probably me too a little bit. I will tell you however, [Alert Thimbleanna] a couple of the runners up from Adopt a Crop made it into the #4 bed.
I am hoping like hell to have:
  • Rainbow chard
  • Snap peas
  • Sweet peas
  • Perfecto radishes
  • DETROIT BEETS
  • Black seeded simpson lettuce
  • Bell peppers of unknown variety
  • Ugly marigolds
  • Token nasturtium
So far we have nothing but dirt and sprinkler heads, but I have hope. It's mostly hope that no more pipes burst so that I don't have to run naked and screaming onto the freeway during rush hour, but it's also hope that this will be my favorite time of year: the time when I do nothing but watch the garden grow and get ready for my REAL FAVORITE TIME OF YEAR: when the harvesting happens.

Like I've told you - my life is vurrrrrry glamorous, dahling.

Wednesday, March 19, 2008

It is SO ON


Tomorrow is the first day of Spring and I would like to know why we don't have the day off as a national holiday.

Especially since HELLO the first sprouts are up in the garden which is a way bigger deal than when my stupid neighbors hang up their Christmas lights in October.

I mean, these are real things that are going to do much fancier things than blink and glow until March (yes, we're still waiting for those lights to come down) - they are going to grow food and also look pretty, attract bees and give me a location to direct my listless gaze.

WAY BETTER than net lights, I'd wager. And, frankly, I'd swap you The First Day of Spring for Christmas any old day of the week. Sadly though, the nation's calendar of appropriate holidays is not under my control, and so I must march off to work tomorrow although I plan to do so under protest but while wearing my First Day of Spring outfit.

Maybe we can start this new holiday off like one of those other kinds of second tier holidays where you still have to come to work but get to dress up and fuck off all day and no one says anything and sometimes you get to drink at your desk. Like Halloween! But without the dogs dressed like drag queens, that is not my bag.

Anyway, my bizarre mood is inspired by the pea sprouts shooting up along their fences in the garden. I spotted them last night and have really been basking in the glow of Something's Growing in the Garden ever since.

Like, I know I will go home tonight and blast past the dog/cat/Bubba/overflowing trash can so that I can get quickly to the garden to stare at their little green leaves.

And then I'll take a hundred pictures, maybe pet them a little bit, tell them they're very cute and small and basically just make it totally obvious to my neighbors that I'm a nutter to the nth degree.

As though they already didn't know. This *is* the 4th gardening season after all. They may have seen me wearing my crazy suit once before.

Anyway - I hope to have a Pickling Cucumber update for you soon (they take longer to sprout than peas) but in the mean time you can look at this volunteer cucumber plant that came up in the tomato bed. I think he's left over from the basketball sized cucumber than was found abandoned and rotting under the lemon cucumber plant last year when I cleaned out the beds.

Whoopsy!


I'll let him get a little bigger and the probably stick him in with the other cucumbers OR if you live close by (San Jose, CA anyone?) and want a Lemon Cucumber plant to call your own, let me know and you can pick him up. He should be ready for adoption in a few weeks.

Happy First Day of Spring tomorrow! Feel free to take the day off or at least come to work in a spring-y get up and have a cocktail at your desk.

Monday, March 17, 2008

FaDSA: March project - Pintucked table runner


I'm about 99.9% sure I did this project wrong and it was not for a lack of reading the four lines of instructions, I'll tell you that. I read those fuckers to the bone.

However, I'm pretty pleased with the way this came out, even though I'll have to iron this thing for sure if I ever wash it so that those pintucks look all crisp, etc.

Perhaps my problems started at the beginning, with My Vision. See, I could not envision how the contrasting rayon thread called for in the pattern was going to make one bit of difference once this beast was sewn together since, to me, it looked like the seams got hidden when the muslin was sewn on.

I thought this strategy might reveal itself in the instructions, but there were only four lines of those, and I wasn't holding out a lot of hope.

Anyone tracking me here?

So, when I bought my linen (Note: this was my "something I've never done before" because technically I've never sewn linen OR pintucks and you can call me lame if you want but that is how it went down and there's no way in hell I'm going at this FO with a needle and embroidery thread.) I went over to the threads and picked out a contrasting rayon thread so that I could be all in line with the directions but kept trying to visualize the final product and could NOT make it make sense.

How was I ever going to see these seams?

Mysterious.

So, because I like to follow shit to the letter and all, I bought some stupid contrasting rayon thread and then I also bought some matching cotton thread because, let's face it, I know what I'm going to do. I'm going to sew it with the cotton thread and bury that rayon crap at the bottom of my sewing basket for "later" and in the event that the Mystery Rayon Thread Secret reveals itself in the four lines of instructions then I am going to bust out my rayon thread and be like, "I knew it all along."

So, no big surprise here, there was no Mystery Rayon Thread Secret awaiting me in those instructions. And I looked, too. HARD. But there wasn't much to look through, so I gave up. Call me a loser, but I think I need things spelled out a little more clearly when "Pintucked Table Runner" involves no pins of any kind and this contrasting rayon thread in the "Materials Needed" column is not obviously presented in the shiny picture in the book.

About those pins...

So, this is how I know I did it wrong. First, I used pins. A lot of them. Three per tuck, to be precise. And also, none of the seams showed in the final product, despite the one picture showing seams in the book. Confusing.

In the end, I went with the process that I thought would get me closest to a runner that looked the most like the one in the photo. Because, really, that's what I'm about: Making shit that looks like the photo. I do this when I cook. I do this when I knit. I do this when I sew. If my FO looks like the picture, then it is a job well done. If my FO looks like a pile of horse shit and I'm not, in fact, trying to sew horse shit, then I dive into a deep pit of despair and self-loathing.

Every project I do gets me *thatmuch* closer to seeking therapy I think.

Anyway, even though I'm sure I did the project wrong, I did end up with a project that looks somewhat like the picture and so I'm suitably happy. I also have a mile of linen leftover so will be making some place mats and napkins OR a skirt or a top or whatever but not another runner.

Also, I'm not sure how one effectively launders linen without ruining it, so please let a girl know, k?

Friday, March 14, 2008

Made with Rage: Amy Butler's Stash and Dash bags


I think I have road rage of the sewing variety because I just broke the last needle in the four-pack that I bought, like, a month ago.

And since this was the first pack of needles I ever bought, since the dawn of me owning a sewing machine in 2001, it seems strange that I was able to sew for, like, seven years with just the needles that came with the machine (four?) and in a month I broke the last of the needles AND went through another four-pack.

What am I? Some sort of sewing psychopath?

It sorta seems that way.

I mean, yes, I clearly swear and make mean faces while I sew - that's a given - but I don't consider myself particularly destructive. At least when it comes to the machine itself. I can ruin a million sewing projects by throwing a tantrum on them with my scissors, but harm the machine? Never?

Oh well, I guess I need to either;

A. Slow down and take deep breaths
B. Stop trying to sew OVER the zipper head.

Seriously people, I think there needs to be something in these sewing directions that includes a "move the zipper head to the middle of the zipper so that you don't try to sew your dumb ass over it and end up breaking your hundredth needle, ok?" part.

Because that's how I always end up breaking needles. I have the project all inside-out like and I'm trying to finish up the last seam that will bring the project to a merciful close and CRACK! I snap the needle off right on the zipper head because it's all jammed over to one side so that I can do as instructed in the Next Step (which I've already jumped ahead to in my head) and turn project right side out through the zipper and press.

But no, I am all YAYI'MALMOSTDONE in my head when the needle goes breaking off and suddenly I'm checking my soft parts for embedded needle heads and realizing that SHIT I can't finish now because I don't have the right needles for the job and Hancock's is closed because it's nine on a Sunday so damn.

Thankfully, in this case anyway, I was able to set aside my rage (and thus do no further damage to my machine) and reconvene at the machine another day with a new idea and some more patience.

I came back to the table the other night with the almost done project, one lightweight needle from the bowels of my sewing box and my fingers crossed. I was going to sew slooooooooooooowly. I was going to take deep breaths. I was going to, perhaps, pray a little bit.

Okokok - lets be honest, I decided to just not have a cocktail first. Sobriety would be my savior.

And as it turned out, the whole scenario was much more serene and simple than I imagined. Literally took me longer to get out the machine than to sew the one last seam along the interior fabric (which I forgot to photograph, but it's cute green dots) which was made SO much easier and successful because OH I MOVED THE FUCKING ZIPPER HEAD TO THE MIDDLE OF THE ZIPPER BEFORE SEWING.

Yes, I understand now. I have learned something. This is key.

I vow to not break any more needles in this way from now on. I'm sure my soft eyeballs will thank me for it.

Meanwhile, so you don't think I was just making this bag for no reason whatsoever, I will tell you that it is a #2 birthday gift for Goddaughter to the Stars and is filled with some pink pearly jewelry for her dress-up collection.

I got the cute apple fabric from a recent giveaway See Katie Sew did and I've been touching it ever time I go into the closet (whoa naughty) wondering what perfect project will get it. There's also some monkey fabric in there that I imagine will make its way to the GTTS in one form or another.

This is also the pinkest girliest gift I think I've ever given because I don't like the "You know she is a girl, right?" comments I get from the grandparents when I give her sweaters knitted from *gasp* blue yarn instead of pink and what have you.

So, there you have it - a very pink, very girly gift with obligatory bows, tulle, iridescent shininess, purses, pearls and pink stripes. Even the card is sparkly and cutesy and so barfaliciously girlish that I can't even show you a photo. THAT is how I know it's girly enough. It makes me want to retch a little.

But I adore this child and so there you go.

Happy #2 Ms. Emma!

You can't read this but I think you know what I mean.

Wednesday, March 12, 2008

My yard thinks it's spring + Oh noooooo + Running Update

My yard thinks it's spring right now, which is good because the weather thinks it's winter (rain? again? really?), my flip-flops think it's summer and the water main in the front yard thinks it's Mardi Gras.

Wha?

So, I went out for my run yesterday morning (running update at the end), and while standing on the porch using the light from my iPod screen to figure out which earphone goes in which ear (does it really matter? I doubt it) I kept getting distracted because:

A. It was dark again because Daylight Savings sucks ass
B. I kept hearing the faint sound of running water

It was making me crazy. What is that sound? Where is it coming from?

So, obviously, I had to investigate. Because it was dark, I was supposed to be running, I had no light source other than the ambient light from the White Stripes album cover art waving all over the pod screen and well, what better time to be wandering all over the yard at random?

With Icky Thump leading the way, I squoze the hose (HA!) - no water. I felt up the sprinkler heads - no water. I probed the soaker hoses - no water. I squinted carefully looking for the Russian River cutting an unexpected swath through the yard - nope.

This must be another side effect of Sucks Ass Daylight Savings. I'm sleep deprived. I'm confused by the darkness. That's what's causing this.

And OH CRAP now I am now behind schedule and must run.

It was a confusing time to be sure. Either way, I chalked The Mystery Water up to a neighbor's potential new sprinkler schedule and went about my trotting way.

30 minutes later when I returned, stretched and started to head inside, I heard it again.

The Mystery Water was back!

Now with the light of day to guide me (thank you 7am) I went through the same motions. Sprinklers - no. Hose - no. Soakers - no. Neighbor's sprinklers - no. Russian River on an extreme and frightening detour - no.

But hey, why is it all squishy over here andohmyfuckwhatthehellohnoooooooooooooooooo!

The main pipe feeding our sprinklers had blown its top.

You know, like in Mardi Gras when you rip your top right off and people throw plastic beads at you? No? Ok, sorry. Forget that analogy.

Anywayyyyyyyyyyy, the friggen coupling/gasket/whathaveyou connecting the sprinkler pipe to the water pipe (the main one that goes to the house yikes) had come apart somehow and was shooting water at an alarming rate right into the ground. Right against the foundation.

YES GREAT! WE NEED THIS! Soil around the foundation of your house is overrated.

It was at this moment that I recalled, in that funky rippling way they do on TV when people flash back in time, the time when Bubba was trying to learn me something and pointed right to that exact pipe and said,

"Remember, if you ever need to shut the water off in an emergency, (points to knob) TURN THIS KNOB! Ok? Don't forget."

I didn't forget! I remembered! And when I was done patting myself on the back for remembering, I scampered over and TURNED THE KNOB (!).

Then I alerted Bubba in my least alarmist voice and we went on a hunt to figure out just exactly what had happened and theorize over how this horror came to fruition.

We blamed many innocent parties including the mailman, the dog, every neighbor individually and probably quietly, each other. In the end we decided that it was probably the inaugural turning on of the sprinklers that caused the sudden pressure change and thus broke the thingee.

Uh, whose fault would that be, then? Nevermind, pointing fingers won't help anything I think.

A further investigation of the situation revealed some extra special rivulets and pools all along the distance of the foundation which made our hearts sing with joy. The squashiness of the front yard wasn't to be ignored either - it was a spongy heaven which I hope my plants will appreciate since I will be woe to ever put water to soil there again, lest my house go sliding into a resulting giant hole.

So, Mardi Gras aside (there weren't any beads so I'm not sure it counts), the water situation has been brought under control and we have now pushed off anything fun we wanted to do this weekend so that we can YAY cut and replace pipes and fittings so that we don't wash away on The New Finny and Bubba River through the neighborhood.

Goodie.

On a brighter note, I think, I'm still running in a way that would indicate that I am training for something. Which was technically untrue until yesterday when I actually signed up for a race. I didn't sign up for *all* the races I think I'm going to run this year because I chickened right out when it came to hitting the "Register" button for the Rock N Roll Half Marathon. I mean, I am still running as though I have a 13.2 miler in my future, but I haven't *committed* just yet.

Give me time!

For now, I'm committed to Pat's Run on 5/3 for no other reason that it's the right distance (4.2M) at the right time (no plans that weekend, not too hot yet), the right location and the right type of course (flat and fast -emphasis on the FLAT).

Once that's said and done I might be brave enough to go back to the computer and officially register for The Knee Blaster, aka the Rock N Roll Half in October. Until then I will be increasing my mileage as though I'm training for the half, but without the pressure of knowing I'll HAVE to do it.

Lord I'm a wuss.

Monday, March 10, 2008

Adopt a Crop: #1 Update


Just thought you'd like to know that this was The Big Weekend when the garden got all planted and the elected Pickling Cucumbers made their debut.

Aren't you glad you have some skin in this year's garden so that you don't have to ignore me all spring/summer/fall until the garden undergoes its winter hibernation? I mean, yes, some of you voted for things other than Pickling Cucumbers, but perhaps your resentment will keep you coming back, if only to hope for an untimely death to the cucumbers in time for me to still plant your crop of choice or whatever.

I mean, that'd be a little bit vengeful, but that's how I'd feel and so it's OK to be mean and spiteful here and I'll still love you.

So, back to cucumbers then.

Those three seeds right there got planted twice over (meaning I planted six total seeds over two mounds) and are hopefully off to a prosperous start sucking up water and perhaps shooting off some roots.

I even managed to get the irrigation lines running properly after an exciting gushing event that immediately followed my flipping of the sprinkler switch.

It's always a fun surprise to see what's going to be waiting for me when I emerge from the basement (where the sprinkler control thingee lives) and peer all squinty like out to the back .40 at the veg beds.

I won't lie, it's getting to be a blurrier view every season which may or may not have something to do with The Old to which I recently referred.

This time there was no squinting necessary since I had a nice clear view (and could hear the splashing) of the geyser that was erupting from the sprinkler manifold in the cucumber bed. We were, at once, watering the cucumbers (yay! their first bath!) the newly naked dirt, the garage, our neighbor's back yard, the fence and the dog.

*Sigh* It must be spring and I must have spent the better part of evil winter with my head in my ass. I mean, what was I thinking expecting a plastic sprinkler manifold to last more than two seasons. Peee-shaw.

Oh well, nothing a 40th trip to the hardware store in two days couldn't fix. And I had a chance to buy some more poppy seeds since it appears I'm stock piling for when California falls in the ocean and no other state will plant the damn things.

Either way the cucumbers, along with the cantaloupe, basil, nasturtium, snap peas, sweet peas, marigolds (so ugly, but so helpful), poppies and borage, all went into the beds on Saturday and are all effectively hooked up to the Best Thing Ever otherwise known as the irrigation system.

It is all very good and spring-ish and I was wearing shorts, a wife-beater and my best old flip-flops for the warmest weather we've had to date this year. 77 degrees? YES, PLEASE.

At the end of The Big Weekend planting I turned to my garden, raised my arms, pointed all my fingers at the beds and with my best Master of the Universe voice commanded them:

"OK plants. GROW."

Feel free to do the same thing at your computer screen right now. I won't judge you.

Tuesday, March 04, 2008

I think The Old is happening

When Bubba and I were out standing in our field (as always - ha!) pontificating about where my new veg bed would go and where The Fruit Tree of Bubba's Dreams would go, we were having a really hard time picturing any of it because of all these damn weeds.

When the convo turned to "lets just fucking nuke them and be done with it" I wasn't thrilled, per say, but I wasn't really putting up a good argument to the contrary. What am I going to do anyway, pull them all myself? By hand? I mean come on, let's not be a hero.

But as time wore on and the weeds got taller still and I spent more time sitting out in the empty veg beds with my morning brew staring my deadly laserbeam evil stare at the weeds, I couldn't get *right* with the idea of spraying chemicals all over the place and especially not right near my veg garden with its organic this and companion planting that and and also not where we're going to plant a fruit tree that will hopefully grow fruit that we will eat.

I mean, I'm not perfect and I'm not even, like, mostly acceptable most of the time, but the contradiction of brewing an organic garden with all of my heart and soul over here and then nuking the ever loving crap out of the weeds right next to it over there was becoming impossible for me to justify.

What kind of a two faced loser was I anyway? And, plus, what if in the Rounding Up some of the chemical cooties got into the garden soil? What then I ask you?!

Horror and tragedy, that's what.

So, last Saturday, while Bubba was off being a very good friend and moving house for his BFF, I summoned all my naive courage and also my mud shoes and best gardening gloves ever and walked out to the back .40.

"Fuck you weeds. Your asses are mine."

Oh yes, I really said it. Out loud at 8:30am. Probably loud enough for my neighbors to hear. And then I pulled weeds for, like, four+ hours.

For a while I was pulling and filling up the yard waste bin and dragging it to the street and dumping it out and doing it over again and thinking, "Huh, this isn't SO bad. What was *my* problem?"

And then after doing that three times I remember thinking, "Huh, this is taking much longer than I expected and how big is this street pile going to get and also my back is kind of hurting."

And then after the fourth trip and finishing up the back area and moving on to the front of the yard and also mowing I thought, "Yeah, so I'll probably be a *little* sore tomorrow, but it's still worth it!"

Oh what a mighty underestimater I am.


It would appear that The Old I've heard so much about (thank you Bubba for these kind and constant reminders) may be finally starting to manifest itself in certain areas of my body. Like, for example, my hamstrings. My hamstrings that feel like they're stretched over a drum. A really big drum that's on fire and also totally immune to the numbing effects of, say, extra large doses of Advil, gin, heating pads, more gin, some PainAid from the first aid kit at work and "therapeutic easy jogs".

It is now Wednesday, a cool five days after The Pulling of a Billion Weeds (four days if you're being generous since I finished in the afternoony hours) and I'm still mostly incapacitated. The dog's walks have been stilted and lackluster. Our chase sessions in the park have been more like "You run around and I'll make growly noises at you from the bench, OK?" sessions. My coworkers think I'm either secretly 90 years old or Frankenstein since I groan when I sit down and walk without bending at the knee. This morning when I went on a mad closet hunt for my favorite flip flops (Yay! Sunny!) I had to ask for help getting up.

I'm only *a little* worried.

But as long as I can hobble my sad self out to the veg beds this weekend and plant the seeds for the Yet Still Organic garden, I'm OK with it.

Take that! Stupid asshole weeds.

Monday, March 03, 2008

FaDSA: Jan/Feb WINNER

Hey Donk,

So, I don't know about you but it feels to me like it's been a million years since we set out on our first project of year 2.

Maybe I've just preoccupied since it is so spring-y around here (YAY! SUNNY!) but I'm anxious to get the March project underway, whatever it may be. So, you go ahead and choose it up and I'll announce the Jan/Feb winner right here and we can all get on our merry ways with this sewing adventure, yes?

Oh, and before I get right to the winner, I'm just giving you a heads up now that I'll likely be referring to Finny and Donk's Sewing Adventure as FaDSA because I can't be typing that whole business out into the title of posts and things. It's a lot. And plus I know our sewing adventurers are very smart people who'll know what I mean when I say FaDSA or at least they'll know enough not to test me so early in the morning.

Ahem.

For our #1 Winner of Year #2:

Lynn of Craftstew for her excellent use of three perfect items: Leftie over wool, sweet birdie fabric and a HOT ass matching button.


These things together resulted in a sweet as Button Scarf that I'd be wearing in a SECOND since I am pretending that spring has actually arrived despite the 42 degree temp displayed on my car's read-out this morning AND of course I'm wearing a skirt and no socks. Whoopsy!

Hope you're enjoying your scarf, Lynn and please send me your address to finnyknits AT gmail DOT com so I can send you out your prize.

Now, Donk, for that March project - I'm ready!

xo
Finny